It is not a laboratory method. It is not large-scale seed production. This is the way I save zinnia seed as a backyard grower working toward softer pastel colors, better flower form, stronger plants, and more useful cut-flower blooms.
- —My Backyard —
Zinnia Breeding
A color-photo and video companion to The Backyard Pastel Zinnia Breeding Project — a hobby gardener’s guide to breeding, saving seed, and growing better zinnias one season at a time.
backyard lab
1
generations of zinnias bred
1
breeding projects
1
cultivars tested
1
- — Introduction
This post shows what that process looks like in my actual garden.
In the book The Backyard Pastel Zinnia Selection Project, A Hobby Gardener’s Guide to Breeding, Saving Seed, and Growing Better Zinnias One Season at a Time, I talk about selecting zinnias in a simple, hobby-gardener way: watch the plant, choose the best blooms, save seed from the strongest mothers, and keep improving one season at a time.
01
Start by Dating the Seed
One of the best habits I have learned is to date the seed when I sow it. Zinnias grow quickly. In my garden, I usually see the first blooms about 2–3 months after sowing.
That first bloom is exciting, but I do not immediately save seed from every pretty flower. I watch the plant first.
- I want to know
01
Does the plant have good vigor?
03
Does it keep blooming in heat and humidity?
05
Is the color close to the direction I want?
02
Does it branch well?
04
Are the stems strong enough?
06
Is the flower form worth keeping?
01
Does the plant have good vigor?
02
Does it branch well?
03
Does it keep blooming in heat and humidity?
04
Are the stems strong enough?
05
Is the color close to the direction I want?
06
Is the flower form worth keeping?
When I see a plant that looks promising, I mark it with a simple bracelet tag. On the tag, I write the date and a few short notes about what I liked.
This makes the seed harvest much easier later because I am not guessing from memory.
02
When to Harvest the Bloom
After a zinnia flower opens, I usually give it about one more month before harvesting seed. The bloom needs time to mature. If you harvest too early, many of the seeds may still be immature.
When I am ready to collect a bloom, I usually cut the stem and place it in a regular home vase while I am still working in the garden.
This is not fancy. It just keeps the blooms together and prevents me from losing track of which flower came from which plant.
03
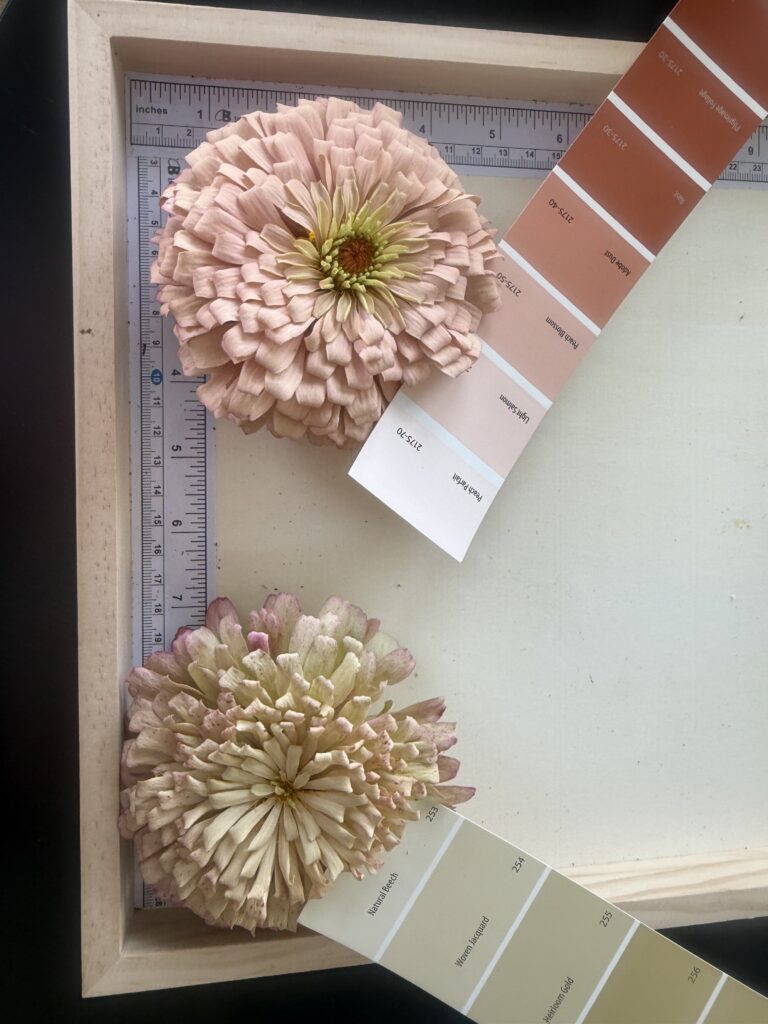
Drying the Flower Heads
After I bring the blooms inside, I place them upside down in a single layer so they can continue drying.
Some growers recommend cutting off the petals to reduce the chance of mold. That makes sense, especially if you are drying a lot of blooms or working in humid conditions.
For my small backyard project, I usually do not bother. I am not growing at scale. I just make sure the blooms are not piled on top of each other and that air can move around them.
Let the bloom dry fully before long-term storage.
04
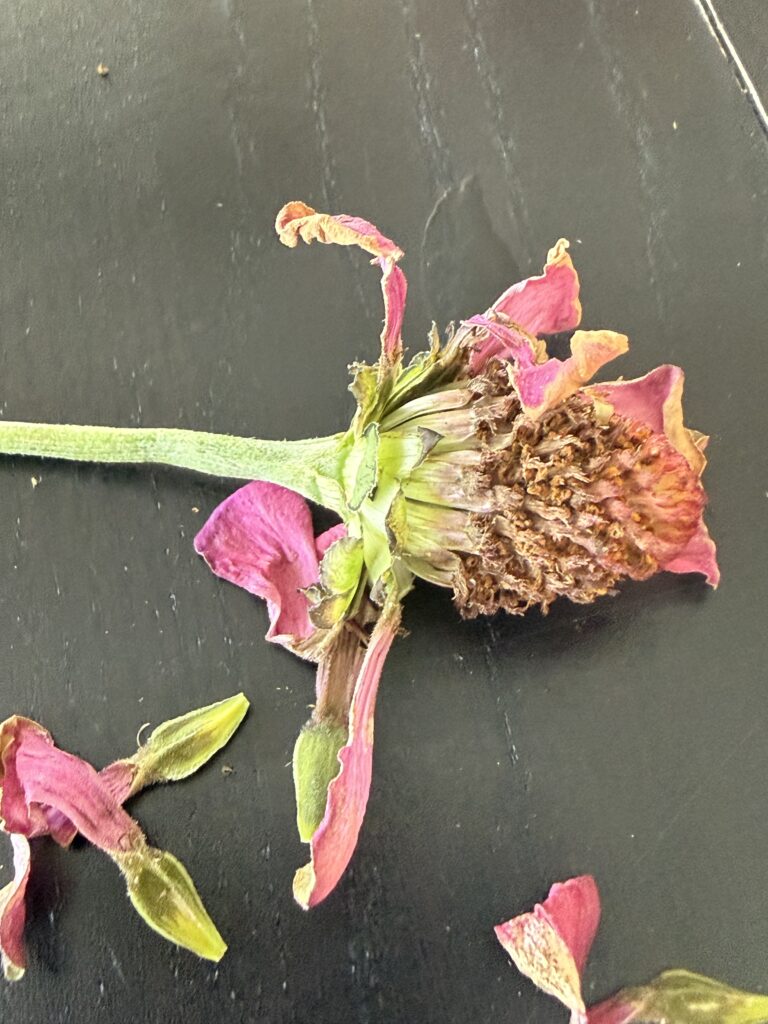
Where the Zinnia Seeds Are
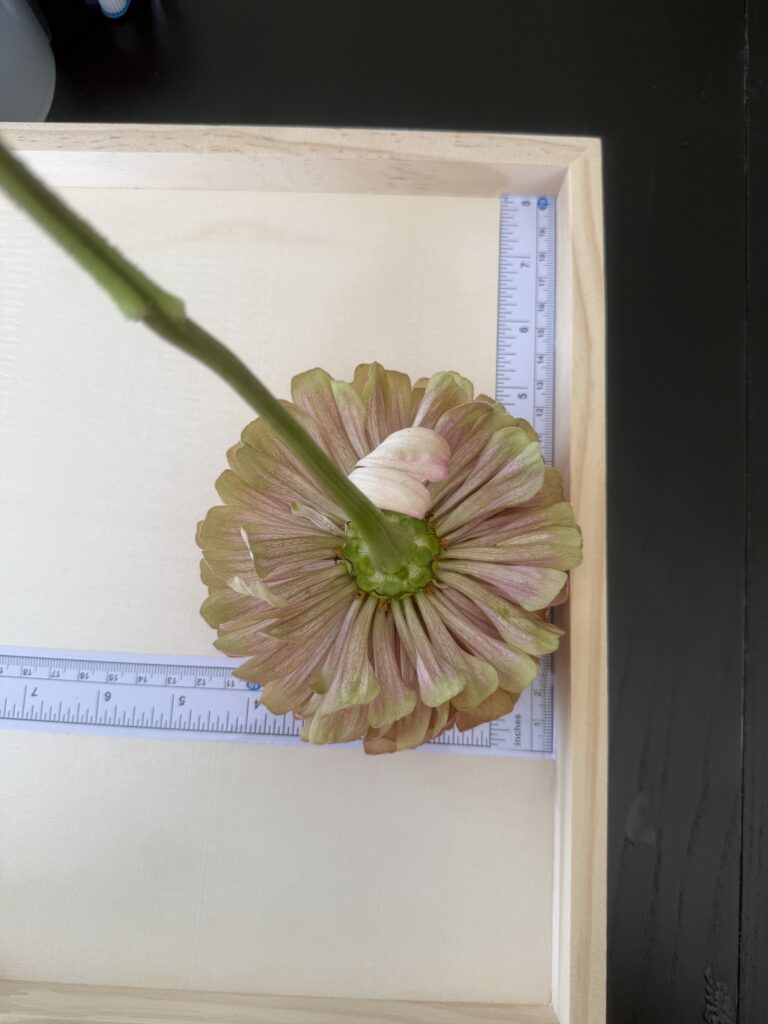
In the photo and video, the petals are not fully brown yet, so the seeds are still green. This is not the stage I recommend for normal seed saving, but it is helpful for learning where the seed is located.
Once you understand where the seed is, the whole process becomes less confusing.You are not looking for seed randomly inside the dried flower head.You are looking at the base of the petals.
Zinnia seeds form at the base of the petals. For this example, I used a petal that still had some color so it is easier to see. When you pull the petal away, the seed is attached at the base.
05
Learning Which Seeds Are Viable
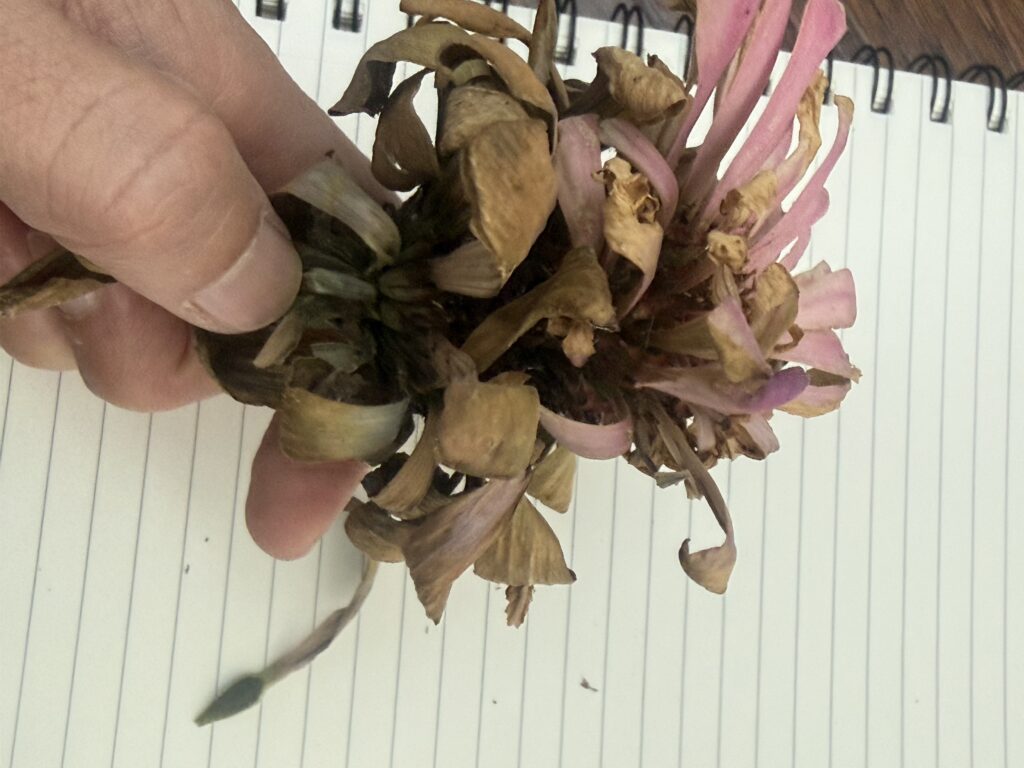
With practice, you begin to feel the difference between a seed that is empty and a seed that contains an embryo.
A non-viable seed often feels thin, flat, or hollow.
When you bend it, there is very little inside.
A viable seed feels thicker. It has more body to it. You can often feel that something is inside.
Thin · flat · hollow
When you bend it, there is very little inside.
Thicker · with body
You can often feel that something is inside.
In this example, when I peel away the outer covering, you can see the embryo inside.
That embryo can be sown immediately. I sometimes use this method when I want to speed up generations in my own zinnia project.
But for most hobby growers, I recommend the slower and safer method:
01
Let the bloom dry fully.
02
Save the dry seed.
03
Label it carefully.
04
Store it properly.
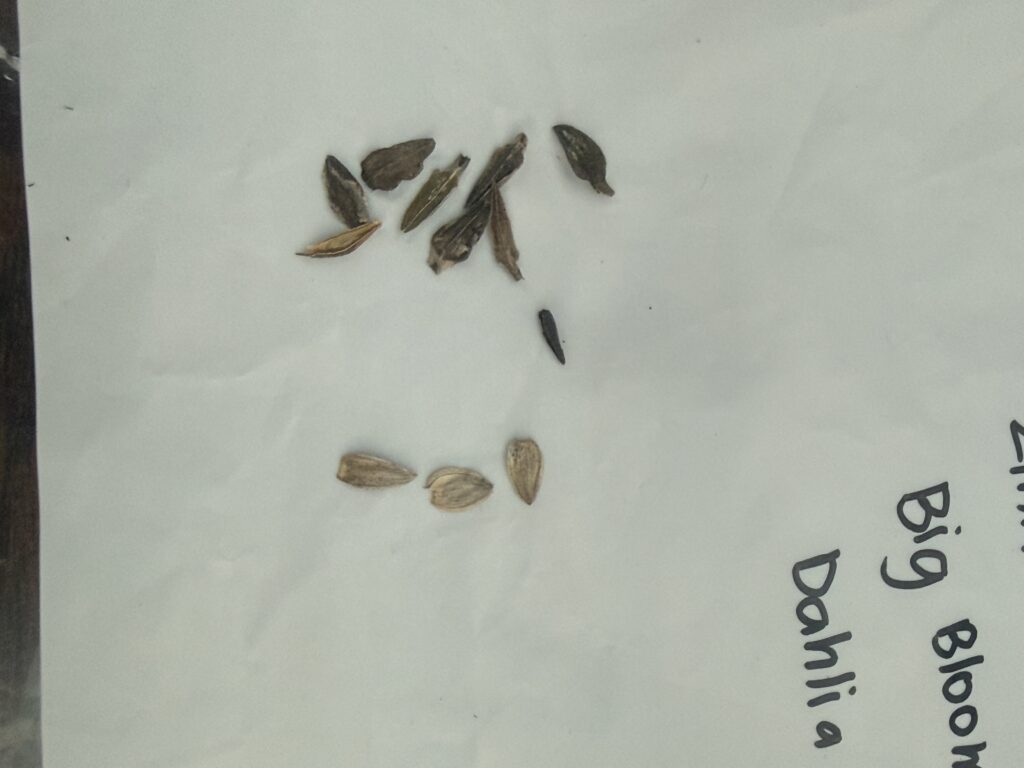
Here is what dried zinnia seed looks like.
06
Saving Seed by Mother Plant
In this project, I do not save all the seed together in one jar. I organize seed by bloom and by mother plant.
This matters because the goal is not just to grow random zinnias again next year. The goal is to learn.
- If one plant gave me the softest pastel color, I want to know that.
- If another plant had the best stem strength, I want to know that.
- If a plant had a beautiful flower but weak growth, I want to remember that too.
This does not have to be complicated. Even a small paper envelope with a few clear notes is better than an unlabeled seed mix.
| Seed Label | N° 01 |
| Plant ID | Pastel Patch 01 |
| Sown | March 2026 |
| First Bloom | June 2026 |
| Seed Harvested | July 2026 |
| Notes | pale blush, double form, strong stem, healthy plant |
07
Why I Keep a Seed Library
When you first look at my seed library, it may seem like too much. But every envelope gives me options.
In the book, I talk about narrowing the project over time. That is important. You cannot keep everything forever. But there is also a risk in narrowing too hard, too fast.
If you only keep seed from one or two plants, your line can become too tight. You may lose vigor, variation, or useful traits that were present in earlier generations. That is why I like to keep backup seed from strong earlier generations.
Backup seed gives you a way back.
If a later generation becomes too weak, too narrow, too uniform, or starts drifting away from the original color world, older seed can help bring useful variation back into the project.
For a pastel zinnia project, this is especially helpful because color can shift from generation to generation. A line that looked soft blush one year may throw brighter, harsher, or muddier colors the next year. Older seed can help you return to a direction you liked.
08
How Long Zinnia Seed Lasts
Stored well, zinnia seed can remain useful for several years. For home storage, I usually think of zinnia seed as having about 3–5 years of practical viability, although germination will usually decline over time.
Cool
Keep storage temperatures low and stable.
Dry
Moisture is the enemy of long-lived seed.
Dark
Light degrades viability over time.
Temperature in °F + relative humidity % should stay under 100.
I first place my seeds in labeled paper envelopes. Once I am sure the seed is fully dry, I store those envelopes inside an airtight container with a desiccant packet. A refrigerator can work well too, but only if the container is sealed tightly. The main concern with refrigeration is moisture. Seeds need to stay dry.
| TEMP | HUMIDITY | SCORE |
|---|---|---|
| 60°F | 30% | 90 |
| 65°F | 35% | 100 |
| 70°F | 60% | 130 |
09
Growing the Next Generation
My early-generation pastel zinnia seeds are not finished, uniform commercial varieties. They are part of an active backyard selection project focused on soft pastel color, improved flower form, useful cut-flower stems, and strong garden performance.
When you grow them, you are not just growing a packet of flowers. You are growing from a living selection line that is still being observed, improved, and refined each season.
I do NOT sell my early-generation pastel zinnia seeds.
From November through February, I send seed samples to the North Carolina Department of Agriculture for purity and germination testing. Under ideal conditions, my goal is to see at least a 90% germination rate. This is also when I begin cleaning, sorting, labeling, and packaging the seed for the next growing season.
That is the heart of the backyard zinnia selection project: not perfection, but observation repeated over time.
Books for the hobby gardener.
Celebrate the beauty of nature year-round with thoughtfully written books inspired by each season’s finest blooms. From the flower gardening to flower arranging, every book is crafted to bring the garden’s changing charm into your home, creating moments of joy, warmth, and connection throughout the year.